RX1Kit™
1. Remove all of the old rubber bushing from the transmission linkage. If there is a small brass bushing on the linkage connector, use the SR1KIT™. If there is no brass bushing on the connector, continue with the RX1KIT™ installation.
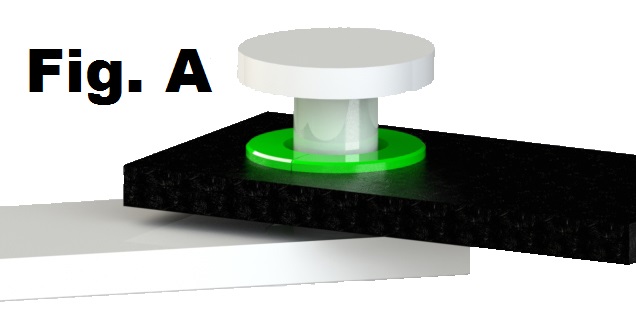
2. Install the new black rubber bushing (shown in green) around the connector post (shown in gray) so that the new bushing can be pushed through the large hole in the lever (rectangular piece shown in dark gray).
3. Push the black rubber bushing (shown in green) into place as shown in the picture. Fig. A

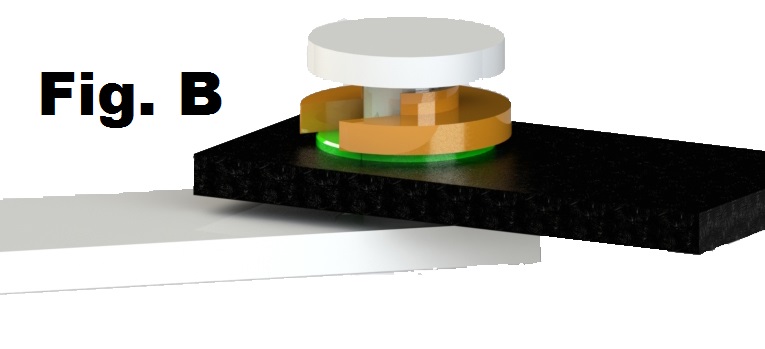
4. Install the collar (shown in gold) onto the connector post and press it toward the bushing so that one of the shoulders slides into the center of the bushing. Fig. B

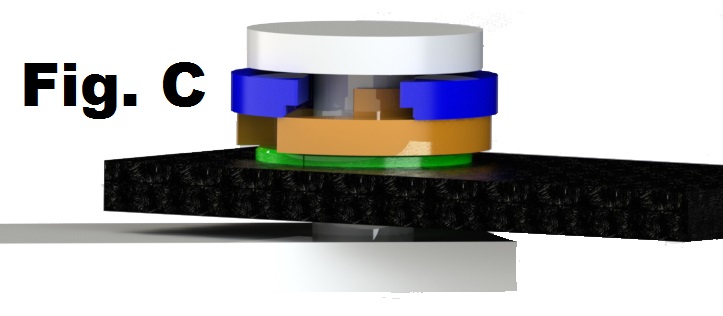
5. Install the washer (shown in blue) over the collar so that the step in the washer is facing toward the collar. Fig. C

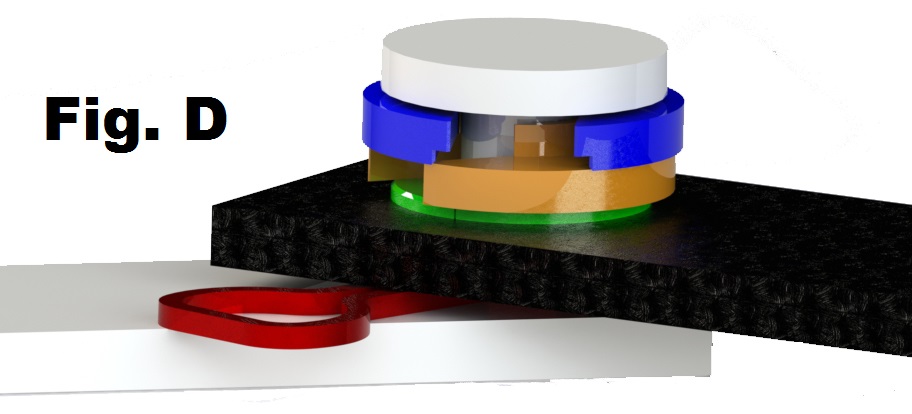
6. Use a small screwdriver to create a gap between the linkage connector and lever. Install the clip (shown in red) around the connector post. Fig. D

7. The installation is complete. Check the installation. The connector should pivot freely. The washer should be impossible to remove (without first removing the clip). Once the transmission rod is reattached to the linkage connector, shift the car back and forth between P and 1 several times to check the installation.
