GC1Kit™
The GC1Kit™ fits at the transmission end of your vehicle's shift cable. This end will be located outside the vehicle either in the engine bay or under the driver's side front tire depending on the application. This is ONLY for automatic transmissions. If you need a bushing to fit at the end of the cable nearest to the shifter (inside the vehicle) please consult our Make/ Model Guide.
*Some of the images were taken off-vehicle for illustration purposes.
- Cable Styles: Below you will see examples of the un-drilled cable styles the GC1Kit will repair. Please make sure your cable-end resembles the styles below before continuing.

- Prepare: Place the shift lever and transmission lever in Park.
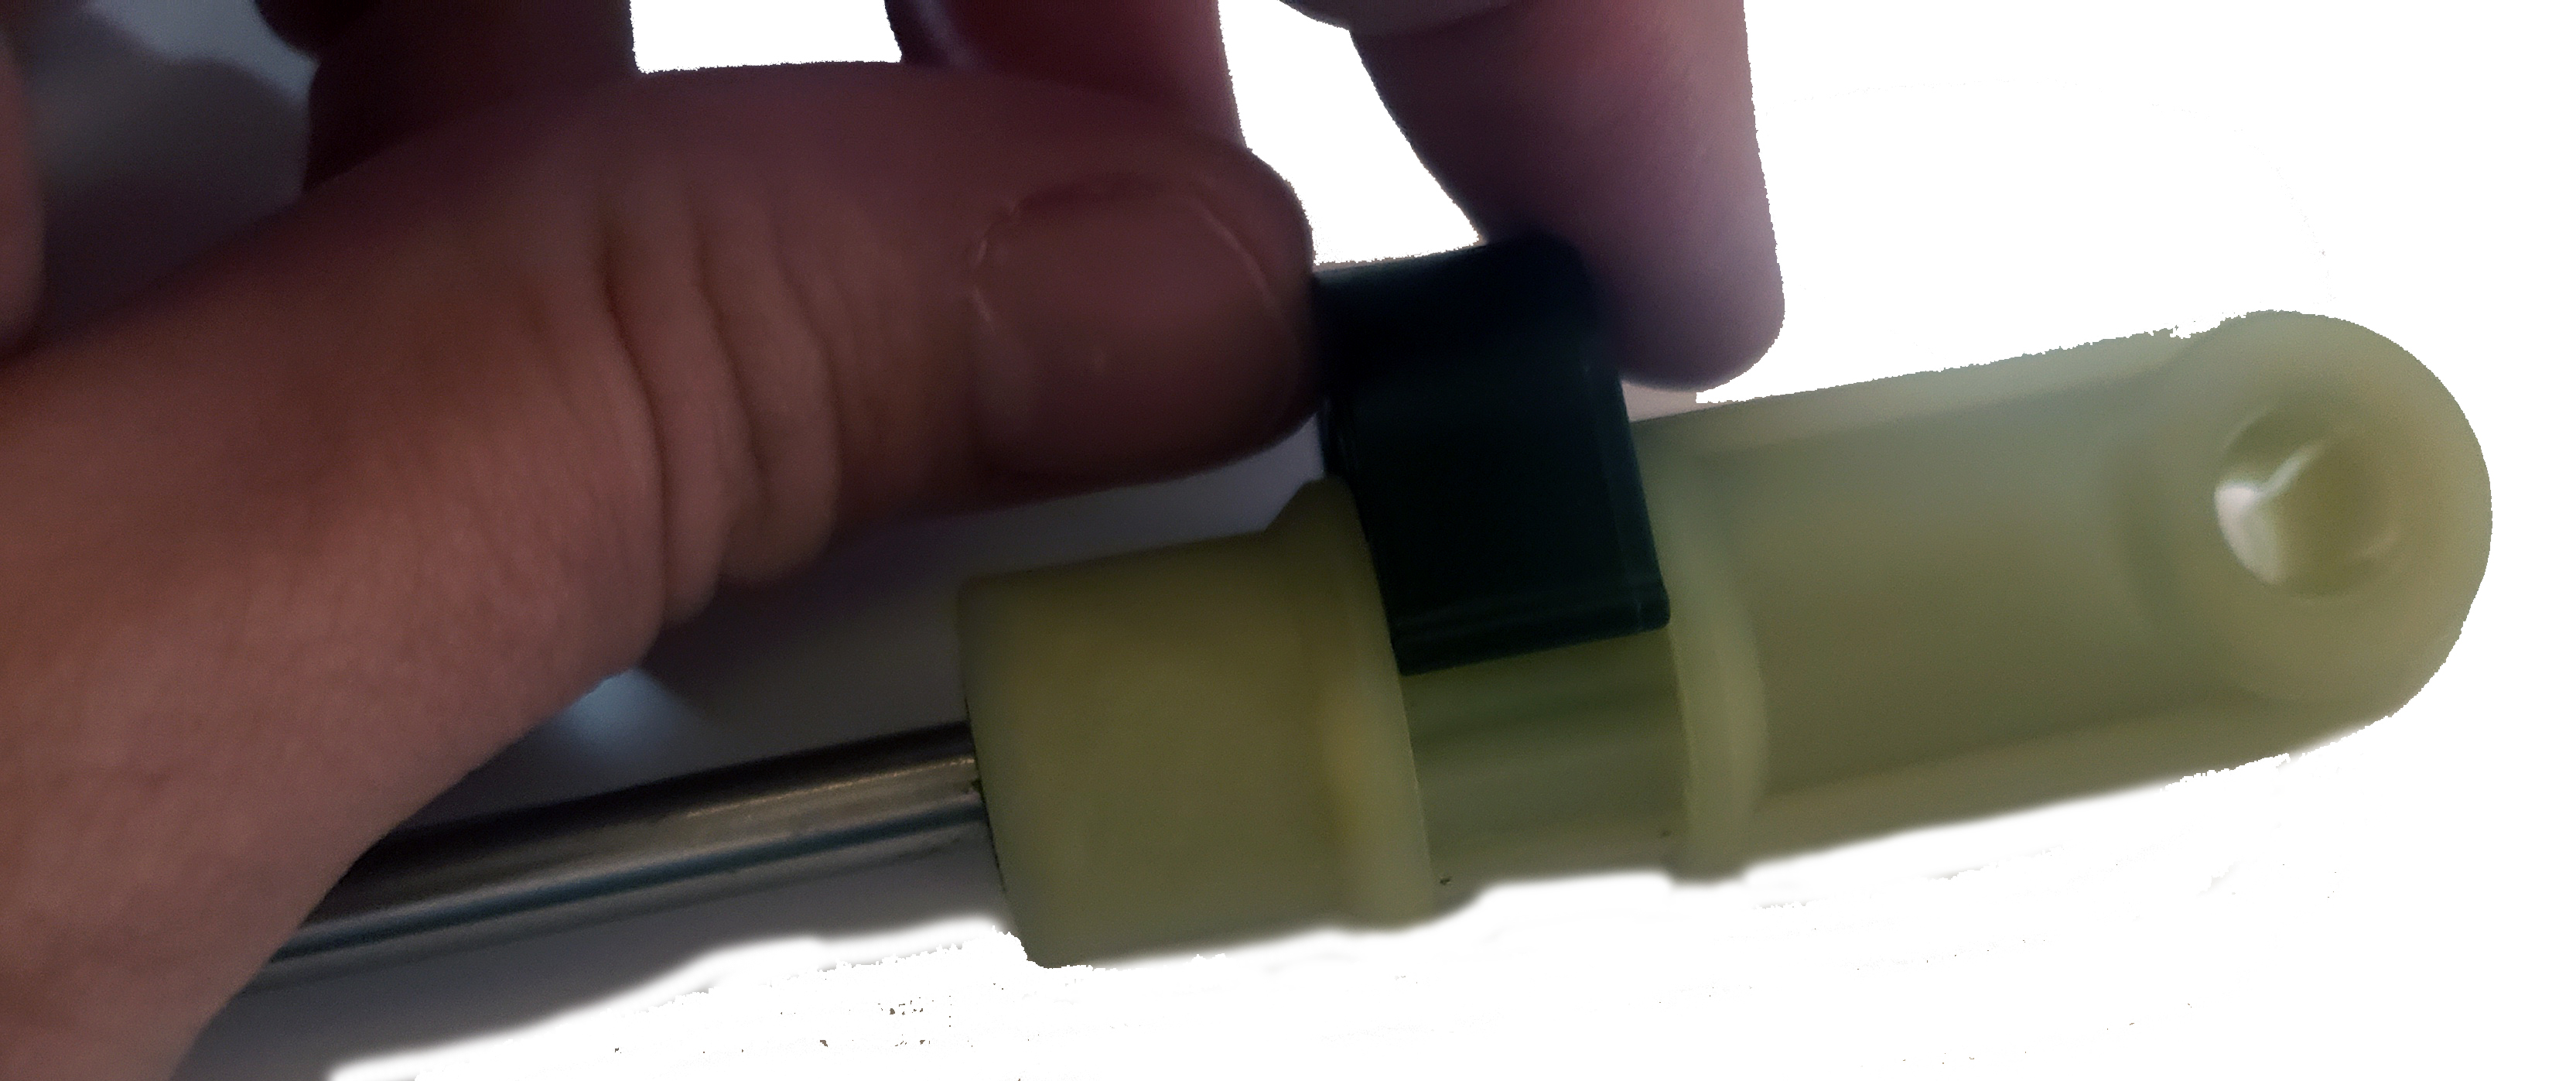
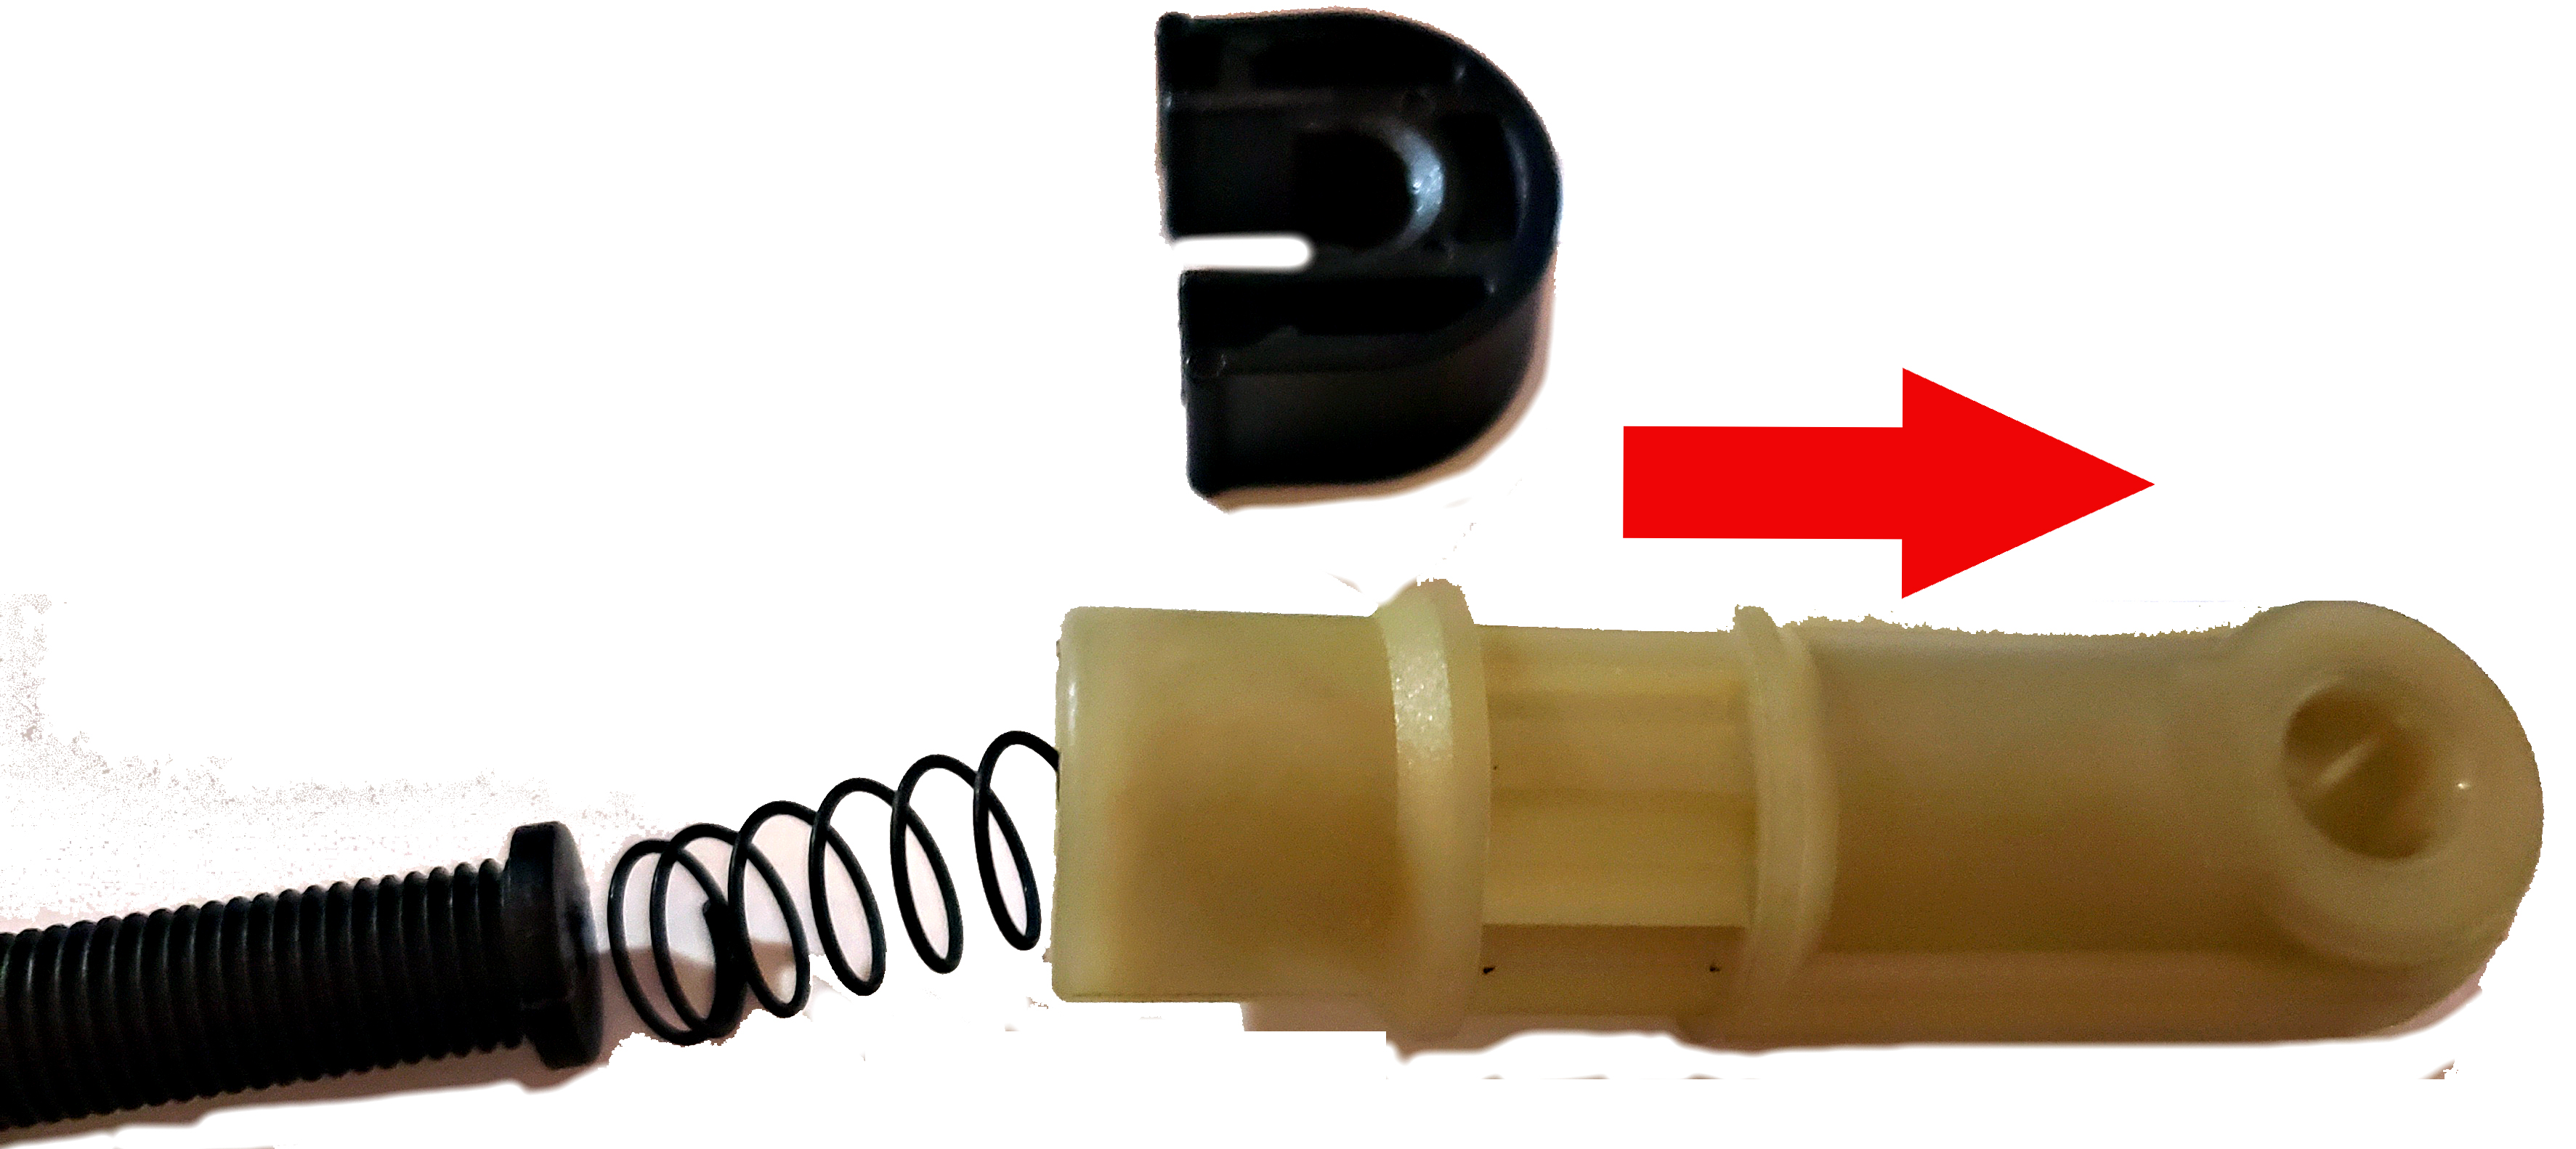
- Cable-end Removal: Use a small screwdriver or your fingers to gently pry the adjustment clip prongs loose on the back of the cable-end. Now remove the clip entirely by pulling up. Slide the cable-end from the cable. There may be a spring contained in the cable-end, be sure to save it along with the clip. (Note: one cable style can not be removed and you will need to drill it in place. A drill guide is helpful in this instance)
1. 
2. 
3. 
4. 
5. 
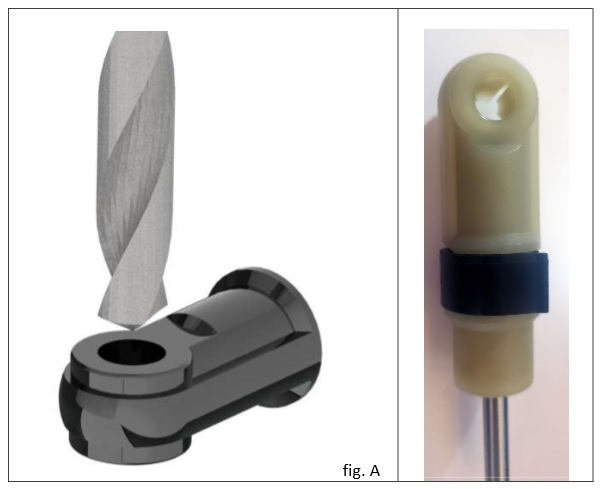
- Drilling: Using a 3/8” drill bit, carefully drill the center of the cable end opening to enlarge the hole. This is easier done from the circular face of the cable-end, as shown in fig. A.
- Check the Fit: Check to see that all of the necessary material was removed and test fit the bushing. Use a file or other tool to remove material from the cable end if necessary. Repeat until the bushing fits in the cable end so that the thin side is about flush with the cable end (for some cable ends, it may be normal for the top of the bushing not to sit all the way into the cable end). It’s better to remove smaller amounts of material than to remove too much.
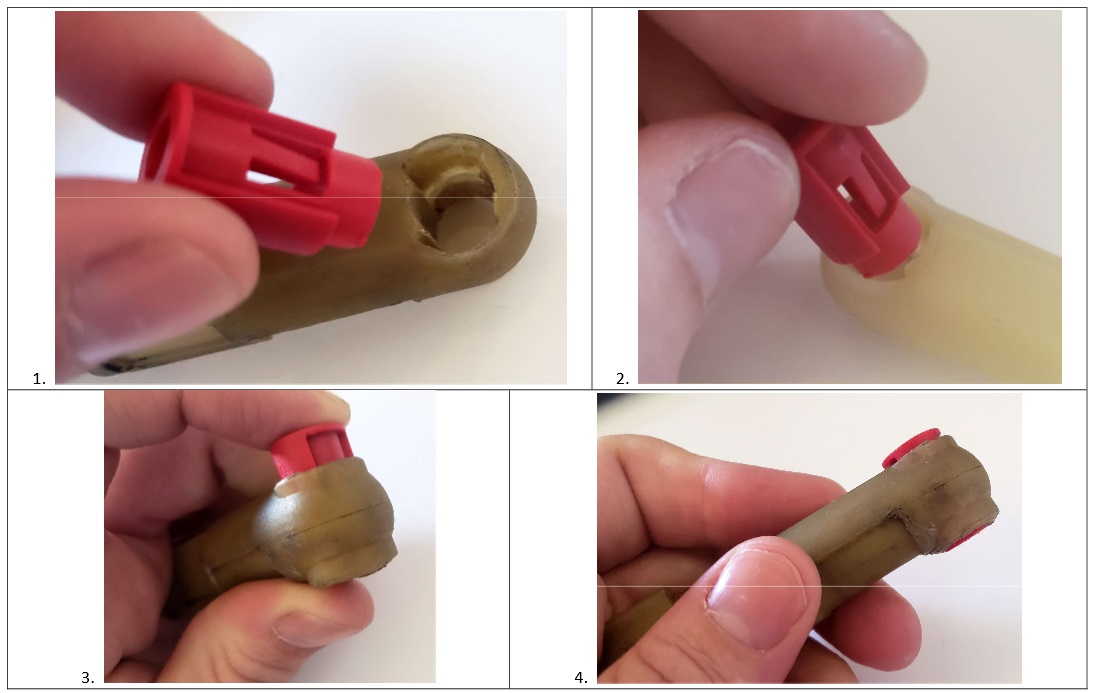
The bushing will be inserted into the opposite side of the cable-end face from where you began drilling (see fig. B). Make sure to align the exterior protrusions on the bushing with the cable-end cavity (see fig. C). Note: the bushing is not a perfect cylinder you can see the protrusions from the bottom of the bushing (see fig. D).
- Reinstall the cable-end: Now that the cable-end is drilled and the bushing's fit has been checked it's time to reinstall the cable-end onto the shift cable. Do this without the bushing installed. If there is a spring slide it back into the cable-end. Slide the end onto the cable and reinstall the clip halfway, so that the cable end slides freely along the notched length of the cable but does not come off.
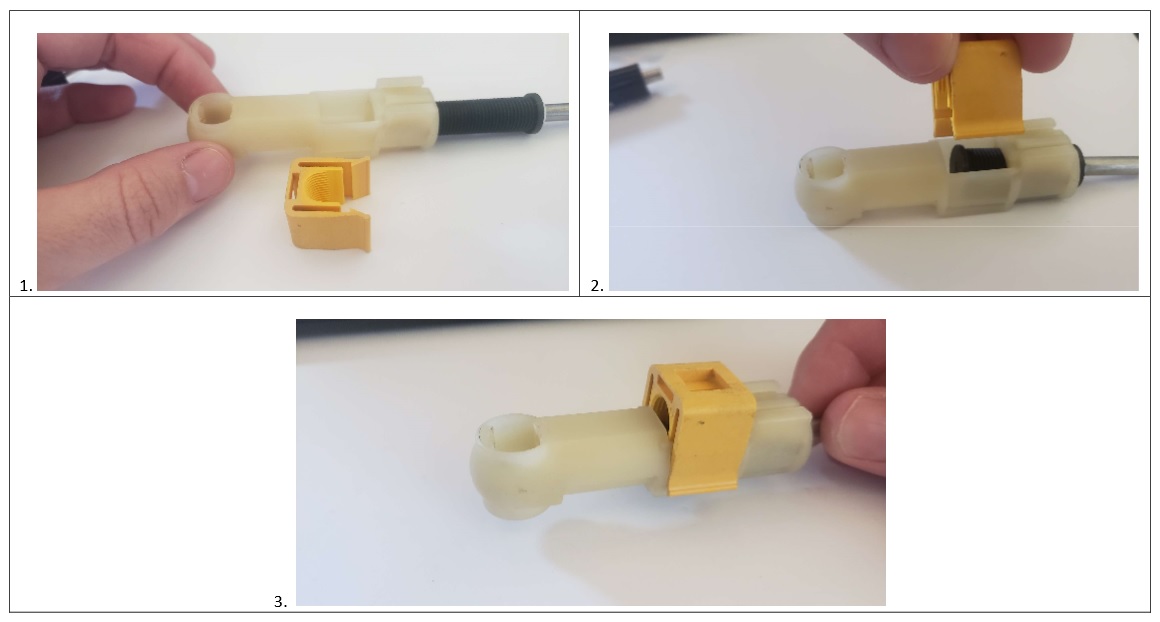
- Install the Bushing: Line-up the bushing protrusions with the shape of the cable-end. Push the bushing into cable-end. The bushing my move a bit in the cable end. This is normal.
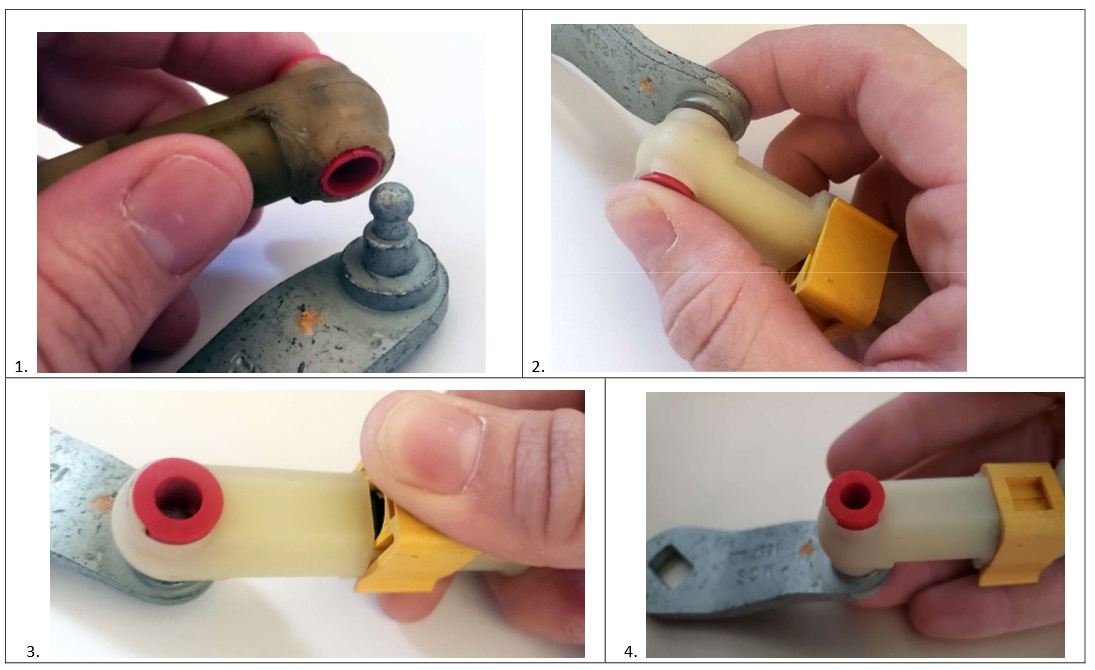
- Connect the Cable-end to the Lever: Double check that both the transmission lever and shift lever are in Park. Place your thumb over the circular face of the bushing and push the cable-end onto the transmission shift lever. Make sure there is no slack in the cable and finish installing the clip into place. When the clip is fully engaged the cable-end and cable will not slide.
- Check the installation: With the key on and engine off, shift back and forth from Park to 1 several times, checking that the PRNDL indicator lines up with the shifter position and that the shifter functions correctly.
